Sunday, November 11, 2012

How To Make So Delicious French Veal Blanquette

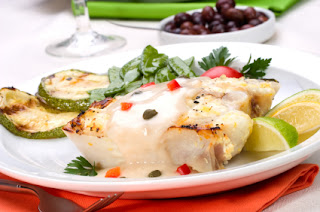
Veal blanquette is a classic French dish, which has become one of the greatest known trademarks of French cuisine. It is a stew based main dish, in which the veal is cooked in a roux and cream based white sauce. This recipe has been introduced to the American food market by Julia Child and now other ingredients like pearl onions and quartered mushrooms are also added to the dish. This is simply a wonderful recipe, which is perfect for serving even in parties.


Ingredients:
  • 4 lbs. of veal stew meat, cut into 1 inch sized cubes
  • 3-4 stalks of celery, cut into large pieces
  • 1 teaspoon of dried tarragon
  • 1 cup + 1/2 cup of dry white vermouth
  • 3-4 leeks, cut into 1 inch sized pieces
  • 3-4 carrots, peeled and cut into 1/2 inch sized pieces
  • 1 lb. of button mushrooms, quartered
  • 1 lb. of pearl onions, peeled
  • 4 cloves
  • 1/2 teaspoon of dried thyme
  • 1/2 cup of unsalted butter, at room temperature
  • 1 large yellow onion, peeled and sliced
  • 1/2 teaspoon of white pepper
  • 2-3 small bay leaves, dried or fresh
  • 2 small cloves of garlic, peeled and minced
  • 5 cups of water
  • 2 large egg yolks
  • Freshly squeezed lemon juice, to taste
  • Salt, to taste
  • 4 tablespoons of all purpose flour
  • A large handful of finely chopped fresh parsley
  • 1 teaspoon of sugar
  • 7 tablespoons of heavy cream

Method of Cooking:

1. Fetch a large pot and line its bottom with half of the veal cubes. Top that with half of the carrots, leeks, onion slices, garlic and half of the celery. Spread the vegetables evenly over the veal pieces to make room for the other ingredients. Then sprinkle 1/2 teaspoon of tarragon, 1 teaspoon of salt, 1/4th teaspoon of dried thyme and 1/4th teaspoon of white pepper over the layer of veal and vegetables. Next, drop 1 bay leaf and 2 cloves into the pot. Once done, repeat the same process of layering by starting with the remaining veal pieces and finishing with the remaining cloves and bay leaves.

2. Once done, place the pot on the stove and set the flame on high. Pour the white vermouth and the water over the entire mixture and then let the mixture come to a boil. Once the mixture starts boiling, turn down the flame to medium and let the mixture simmer slowly for 30-40 minutes.

Simmer the mixture uncovered for the stated time period and make sure that you skim off the scum frequently that gets collected on the surface of the liquid. Once the time elapses, cover up the pot with a heavy lid and let the mixture simmer for another 50-60 minutes or until the meat becomes very tender. The meat should be very tender but it should not start falling apart from the bones.

3. Now take a large bowl and place it beside the pot. Fish out as many veal and vegetables pieces from the stew as possible and then strain the mixture to seperate out the remaining spices, meat pieces and vegetables from the stock. Discrad the bay leaves and the cloves and retain the stock for later use.

4. While the stock is boiling, take a saucepan and fill it halfway up with water. Place the saucepan on the stove beside the pot and then let the water heat up. Once the water reaches the boiling point, drop the pearl onions in it and boil them for 1 minute. Once the time gets over, drain away the water from the saucepan by dumping the pearl onions into a colander. Now let the onions cool down a little by letting them sit at room temperature for 5 minutes. Once the pearl onions are cooled enough to handle, peel off their skin and then set them aside.

5. Turn up the flame to high and let the skillet heat up. Once the skillet heats up, put 2 tablespoons of butter in it and wait until the butter melts completely. Once that happens, put half of the mushrooms into the skillet and brown them on both sides by stirring them occassionally for 5-7 minutes or until they are nicely browned on both sides. Once done, transfer the browned mushrooms to a plate and brown the rest of the mushrooms in the same manner. You can brown all the mushrooms at a time but make sure that you don't overcrowd the skillet; otherwise, the mushrooms will sweat instead of browning.

6. Once all the mushrooms are nicely browned on all sides, remove the skillet from the hob and place a saucepan on it. Adjust the flame and set it on medium and then drop the remaining butter into the saucepan. Swirl the saucepan to coat its base with the butter and also to melt the butter quickly.

Once the butter melts completely, add-in a little bit of the flour and whisk it to mix with the butter. Continue adding a little flour at a time while whisking the mixture until the entire flour gets moistened with the melted butter. Once that happens, pour 1 cup of the reserved veal stock into the saucepan and whisk it vigorously to combine it immediately with the roux.

7. Next, whisk-in 2 cups of the remaining veal stock. Stir the sauce lightly and then season it with a small pinch of salt. Once everything is mixed, let the sauce boil vigorously for 4-5 minutes or until it becomes a little thick. Then turn down the flame to medium low to simmer the sauce by whisking it frequently for 8-10 minutes or until it turns creamy and thick.

Wednesday, November 7, 2012

A Famous Chinese Noodles Recipe

Chinese food recipes or cuisine has turned into a staple world food, loved by people around the world. A third from the world's population enjoys Chinese food every single day, since it offers dishes which are considered to be a few of the tastiest and unique in the world. Although it started off in China, the trend of this oriental cuisine has become widespread in the Western world, exemplifying the quality and lovability of Chinese food. Chinese food is a popular cuisine in America, with restaurants found throughout the country. Many items on the Chinese food menu are deep-fried, loaded with sodium and drowned in sauces. However, if you choose wisely you can make some great, healthy choices. Chinese restaurants serve an array of vegetable and lean protein dishes for you to enjoy.


Many Chinese recipes are quick, simple to make, or both. Some can be created with ingredients that can be found for the most part local supermarkets, while some may need a trip to a Chinese/Asian market or utilizing a substitute. Whether you're a new comer to Chinese cooking or simply searching for a recipe that does not require spending a lot of time in the kitchen. People of the Western culture appreciate Chinese food for its combination of superb taste and affordability. Instead of seeing it as a foreign food that is never to be understood and difficult to cook, it has become known that Chinese cuisine is in fact easy and convenient to make in the comfort of one's own home. With all the basic ingredients of common dishes such as bean sprouts, bamboo shoots and water chestnuts available from any neighborhood supermarket, Chinese food has been localized for people everywhere.

Chinese Noodles are magnificent recipes in chinese food. These are so appreciable among kids. This Chinese noodles recipe is a vegetarian noodles recipe. Noodles are a favorite of most children. Stringing, sucking, rolling the noodles around the fork provides them with lot of fun as well as the nutrition. Chinese noodles, whole wheat based noodles are healthier than the white flour based noodles. You also have a choice of egg noodles and eggless noodles. Many kids do not like to eat their veggies in any form but make an exception to the vegetable noodles.


Chinese Noodles Recipe

Noodles – 200 gms
Water – 4-5 cups
Salt – 1/2 tsp or to taste.
Butter or vegetable oil – 1 tbsp
Pepper powder – 1/2 tsp or to taste
Tomato ketchup – 1 tbsp
Soya sauce (optional) – 1 tsp
Red chili powder (optional) – 1/4 tsp

Instructions:

Heat water till it starts boiling. Add noodles to the water and let boil for 3-4 minutes. Drain and add to a bowl. Add 1/2 tbsp oil and keep aside till needed.In a pan, heat 1 tbsp oil, add chopped ginger, garlic and onion. Sautee for 2 minutes.Add beans. Cook for 2 minutes stirring. Add cabbage, capsicum, green peas. Cook for 2 minutes.Add tomatoes, salt, pepper powder, ketchup, Soya sauce. Mix well.Place the boiled noodles on a serving plate. Add the cooked vegetables mix on the top of the noodles in a heap. Serve immediately piping hot.

You may also add the noodles to the frying pan and mix with the vegetables before
serving. It tastes great that way too. Check if your store bought noodles contain salt and add accordingly. For variation, Leave out pepper powder, tomato ketchup, soya sauce and add curry powder or rasam powder. It is a tasty change from the usual noodles. and try this chinese noodles recipe.

Monday, November 5, 2012

Tips For Cooking The Best Salmon Steaks


Salmon steaks are a favorite among all age groups. Cooking them is not at all a tough task. Rather it is much easier than it seems. Let us try and know how to grill salmon steaks over a stove top. The method is as interesting as the final result would taste! So what's the wait for? Let us first have an idea about the things which are required for the purpose of grilling salmon steaks on the stove top. The ingredients required are as follows:
  • A grill or a heavy skillet stove
  • Oil required for grilling (preferably olive oil)
  • A choice of your seasoning
  • A lid which can cover the salmon steaks completely
  • Paper towels
  • A large spatula

The process of preparing delicious and mouth watering grilled salmon steaks over a stovetop is as described below:
  1. Begin the process by first seasoning the salmon steaks with your choice. Make sure that the seasoning is evenly spread on all sides. Do not bother if there is skin on one side. Now keep the seasoned salmon steaks on one side and start heating the pan grill on a high temperature. Remember that the pan should not get overheated. For knowing whether the pan has perfectly heated or not, just sprinkle some water on the grill. If the water sizzles up, you know that your grill is ready for use.
  2. Now you need to add the olive oil to the grill. You can do this by either pouring the oil over the pan or by just spreading the oil with the help of a spatula. You can also use a paint brush to spread the oil over the pan. Just be careful that the brush is able to sustain the heat. Otherwise a paper towel works best for spreading oil over the pan of your grill. In case you are feeling the fishy smell of the salmon steaks all over your kitchen, just switch on the exhaust fan.
  3. Take the salmon steaks and put it over the pan. Do not forget to put the seasoned skin side down first. Here if you find that the heat is a bit high, you can lower it to your suitability. Do not panic if the skin side gets deep brown by the heat as most people prefer not to eat the skin portion.
  4. After some time when you find that the flesh of the salmon steaks have started cooking and is beginning to brown a little in color, you can use the spatula to turn over the steaks in the pan. Just allow the steaks to cook for sometime. You can get a hint of the salmon steaks getting cooked nicely when the edges of the steaks begin to show signs of the flesh cooking towards the center.
  5. After you have made yourself sure that the salmon steaks have cooked themselves properly, cover them with a large lid that ensures all the salmon steaks are inside it. You can pour a little bit of hot water under the lid when you place it over the fish. This is done for ensuring a steam which enables faster cooking. You can also add the hot water more than once.

Wednesday, October 31, 2012

How to Cook Live Crab

As a kind of fishing, crabbing was as easy at it got, as long as the crabs were abundant. Just tie a chicken neck to a crab net, lower the net into the water, then check it every 5 minutes or so. Sometimes you would pull the net up to find three or four crabs fighting over that piece of chicken.
Catching crabs usually leads to cooking them, and that in turn usually means boiling them alive, as you would with a lobster. While some people are squeamish about this, it's really the only way to prepare fresh crab and make sure you won't get sick from eating it. That's because crab (again, like lobster) tends to decay quickly following death. It really requires immediate cooking.
So, here's how to do the deed:
1. Get a big pot or pan, fill it 2/3 full of water, and bring to a rolling boil on top of the stove.
2. While the water is boiling, pour in about 1/4 cup of salt.
3. When the water returns to boiling, drop in the live crab.
4. Boil for 15 to 25 minutes. The larger the crab is, the longer you should boil it.
5. Pour everything into a sink and thoroughly rinse the crab in cold running water.
Now, that was the easy part of preparing a crab to be eaten. Getting at the meat after it has been cooked is trickier, especially if you've never done it before.
First, you should twist off the legs and claws and set these aside. Next, hold the crab's body, head upward, and smack the bottom edge against a counter surface or chopping board. Lay the crab on its back and, with your thumbs, push the center of its body out of the shell. You'll see a small sac just behind the mouth of the crab--pull this out and throw away. You also should be able to recognize gills connected to the center part of crab; these should also be discarded.
You'll find meat in four places on the crab. What remains of the center part after you have followed the instructions above will be meat; just section it or pull it apart to use it. There will also be meat attached to the inside of the shell, which you can scoop out with a spoon. You will definitely want to retrieve the delicious meat to be found in the claws--do this by cracking the claws with something heavy such as a mallet. Finally, the legs themselves will contain some meat, which you can get at in the same way you do the claws.

Sunday, October 21, 2012

Let Me Teach You How To Cook Spaghetti Carbonara

Garlic or onion, pecorino or parmesan, bacon or ham, cream or butter – how do you like your carbonara, and what's the secret to getting that perfect consistency?
A dish whose principal ingredients are eggs and bacon was always going to be a shoo-in for the British palate: certainly spaghetti carbonara was a regular in my dad's repertoire when pesto was only a glint in a supermarket buyer's eye. As with so many Italian foodstuffs, it has a disputed history, although most people accept that carbonara probably originated in, or near Rome.


It's apparently named after the carbonai, or charcoal burners, allegedly because it was a favourite of these grimy men who spent months deep in the Apennines, relying on foodstuffs that could be easily transported, stored and then prepared over a fire. Sophia Loren claims to have happened upon a group of these lucky fellows while filming Two Women in the mountains in the late fifties – who obligingly cooked her a slap-up carbonara lunch.

Loth as I'd be to contradict the legendary Loren, there are people who believe that the whole carbonaio thing is simply a romantic legend, suggesting instead that the dish was created by local cooks for American GIs who took their rations of bacon and eggs to them to prepare over streetside charcoal braziers. More mature Romans dispute this however, claiming they remember enjoying carbonara while said GIs were still eating milk and cookies at their mother's knees.

Most plausibly of all, in my opinion, is the theory that the name simply refers to the copious amounts of black pepper customarily added to the dish: so much, in fact, that it's almost as if it's been seasoned with charcoal. It's one of those things which people will no doubt still be squabbling over as the earth implodes: far more important, in my opinion, is working out how to make a really good one. Which is where I come in.

Thursday, August 9, 2012

You Can Make The Most Delicious Kimchi By Yourself

The national Korean dish is kimchi, kimchi is basically spiced, pickled and fermented cabbage although the recipe and ingredients can vary from region to region in Korea. The main ingredients of the dish however are cabbage, cucumber, radish and scallion.
Fermented vegetables used to make kimchi came about in the 7th century when kimchi was fermented as a way to store vegetables. By the 12th century, kimchi was developed into a tastier dish where spices and herbs were added to enhance the flavours. Then finally in the 18th century hot red peppers were added to kimchi to give it its spicy and distinctive taste still used today.

In modern times, kimchi has been introduced more widely into the world by Korean immigrants who have shared this dish with other cultures where it has become a popular side dish. It has even become a more commercial dish in recent years and it can be found in supermarkets usually in Western countries where there are larger populations of Korean immigrants.

Practically eaten at every meal, Koreans have given the world a fantastically healthy dish to have either on its own or as a side dish. A great source of vitamin C, kimchi can help reduce cholesterol levels and slow the effects of aging!

It has a low calorie content and is very low in sugar and fat which makes it a great dish to eat if you are aiming to lose weight. The fermentation process the kimchi goes through means that probiotic bacteria is produced which helps the digestive system. Kimchi is packed full of vitamin A which is great for healthy, skin, teeth, and also helps improve vision!


Ingredients:
  • 2 large Chinese Cabbages
  • 230g rock salt
  • Water
  • Kimchi Sauce:
  • 10 tbsp of fish sauce
  • 10 tbsp of red pepper powder
  • 1 onion
  • 4 or 5 cloves of garlic
  • 1 oriental pear
  • 1 tablespoon of salt
  • 1/2 tablespoon of sugar
  • Small piece of ginger
  • 4 spring onions
Cut the cabbage into chunks and soak in water with 180g salt. Leave to soak for up to 5 hours.

Mix the sauce ingredients in a blender except the spring onions. These can be chopped into chunks and added to the sauce after it is properly blended.

Drain the cabbage and add the kimchi sauce, mix it by hand then add salt to taste. It should have a fairly salty flavour.

Store your kimchi in jars in the refrigerator for a week at which point it will be ready to eat.

Thursday, August 2, 2012

These Basic Knowledge About The Famous Sushi

Sushi is a Japanese delicacy made of cooked rice and fish wrapped firmly in nori. It may contain vegetables and fruits. Fish may be raw, cooked or marinated. Zake Sushi Houston is just one of the many restaurants serving sushi and other Japanese specialties.

Freezing and refrigeration play a big role in preserving the freshness of fish. In the past, fish used should be preserved by wrapping it with raw rice grains and allowing fermentation process to take place for several months. Another way to ensure food safety, sushi handlers partially cooks the fish to eliminate bacteria causing illness present in temperature abused raw fish.By dining in Zake Sushi Houston, residents and tourists in Houston have a chance for an experience.


First things first; do not confuse yourself between sushi and sashimi. These two are different Japanese dishes. Sushi is fish with rice wrapped in nori while sashimi is fish served without rice. Zake Sushi Houston and other Japanese restaurants serve different types of sushi. There many types of sushi. The ones you will read here are the most common types of sushi. Hand-formed sushi or Nigri-sushi has a small oval or rectangular pad and firmly pressed rice. It is served with a topping and may or may not be served with wasabi depending on the customer's flavor preference.

Maki-sushi is a popular type of sushi. It is cylindrical in form and makes use of seaweed wrapper or nori in wrapping rice and fish or any filling. Maki sushi appears in a uniform shape because it is rolled using a bamboo mat. There are two kinds of Maki sushi. Hosomaki contains only one filling and is thinly rolled. Futomaki has many filling and appears thickly rolled. A known concoction of Maki is California Maki which contains rice, protein, ripe mango slice and cucumber. It is served in Zake Sushi Houston and in sushi houses. Gunkan-maki is served without a nori wrapper. Ingredients are firmly hand-pressed using a cup. Temaki-sushi has a cylindrical shape. It is also called hand-rolled sushi. All of the filling are placed in nori and rolled by hand. Another name for Temaki-sushi is Japanese taco.

Sushi sides are served in Zake Sushi Houston. Among the most common sushi sides are pickled ginger, wasabi paste, shredded daikon and soy sauce. Pickled ginger has a pink color and served to rinse the palate after several bites of sushi. A blob of wasabi is served to give that extra kick. It appears green and is extremely spicy when taken in large amount. Shredded daikon, a not so favorite sushi side is served to also rinse the palate. Shredded daikon is a white and mild tasting radish. To add a salty and soya taste to sushi. Soy sauce is often served in bottles and small saucers or sauce dishes are provided for pouring a small amount of soy sauce. Some restaurants prepare their own blend of sushi sauce to provide an easier dining experience.

Tuesday, July 3, 2012

This Recipe Will Help You Cook The Most Delicious Spaghetti

Recently, spaghetti is becoming more and more popular all over the world, it is not only nutritive but also quite easy to cook. There is a very simple recipe, and if everything is right you can try to do it at your home by yourself, by the time the spaghetti is done cooking all the ingredients can be mixed together, pop it in the oven for 10 minutes, and you’re ready to eat. This Southwestern Spaghetti Recipe is very easy, if you are looking for something a little different give it a try.


Ingredients

8 ounces spaghetti noodles

1/2 cup milk

1 egg

1lb ground beef

8 ounces fresh mushrooms

1 medium onion

1 medium green bell pepper

2 garlic cloves

1 teaspoon chili powder

1/2 teaspoon cumin

1/2 teaspoon oregano

1/2 teaspoon salt

1/4 teaspoon pepper

2 (8 ounce) cans tomato sauce

1/2 cup shredded cheddar cheese

1/2 cup shredded Monterey jack cheese

1 can sliced black olives

Instructions

Pre-heat the oven to 425 degrees.

In a large bowl (or in the pot you boiled the spaghetti in) combine the drained cooked noodles with milk and egg. Mix well.

Butter a 9×13 inch casserole dish and pour the noodle mixture into the bottom.

In a large skillet brown ground beef, onion, green bell pepper, mushrooms and garlic.
 
Add chili powder, cumin, oregano, salt and pepper. Stir and cook for 2 minutes. Stir in the tomato sauce and cook for 2 more minutes.

Spread the meat sauce over the spaghetti noodles. Top with cheese and olives. Place into the oven and bake at 425 degrees for 10 minutes or until the cheese is melted and bubbly.

Sunday, May 27, 2012

The Tempting Spinach And Cheese Is Easy To Make

These tempting appetizers look like they're difficult to make...but they're not. They feature a spinach, onion and cheese filling simply rolled up in flaky puff pastry and sliced into pinwheels. You can assemble the spinach and cheese casserolein less than 10 minutes by using preshredded cheeses. Pair this dish with fresh berry salad and mini muffins for a lovely Mother's Day or graduation brunch.
  
Spinach And Cheese
Ingredients
  
1 tablespoon butter, melted Cooking spray
  
2 (6-ounce) packages fresh baby spinach
  
1 1/4 cups (5 ounces) shredded reduced-fat sharp cheddar cheese
  
3/4 cup (3 ounces) shredded Monterey Jack cheese
  
1 1/3 cups all-purpose flour (about 5 3/4 ounces)
  
1 1/2 cups fat-free milk
  
1 cup egg substitute
  
1 teaspoon salt
  
1 teaspoon baking powder
  
2 teaspoons Dijon mustard
  
1/4 teaspoon freshly ground black pepper
  
1/8 teaspoon ground nutmeg
  
1/8 teaspoon ground red pepper
  
Directions
  
Preheat oven to 350 degrees F (175 degrees C).
  
In a large bowl, combine ricotta, spinach, onion and egg. Season with parsley, pepper and garlic powder. Mix in 1 cup mozzarella and 1/4 cup Parmesan. In a separate bowl, stir together spaghetti sauce and water.
  
Spread 1 cup sauce in the bottom of a 9x13 inch baking dish. Stuff uncooked manicotti shells with ricotta mixture, and arrange in a single layer in the dish. Cover with remaining sauce. Sprinkle with remaining mozzarella and Parmesan.
  
Bake in preheated oven for 45 to 55 minutes, or until noodles are soft.

Monday, May 7, 2012

Fresh Sardine Dishes That Will Be Loved By All Members Of The Family


Sardine Recipes
Sardines are the most popular and commonly used fish for culinary purposes. Do you also know that these fish have numerous health benefits and hence are considered as one of the healthiest foods? Sardines contains high amounts of proteins, several vitamins, essential amino acids, etc. As they are easily and abundantly available in nearly all places, you can easily include them in your diet. Here are some interesting canned and fresh sardine dishes that will be loved by all members of the family.

Healthy Recipes with Sardines

Although it is said that when buying canned sardines, you should look for those dipped in water or tomato sauce, rather than oil in order to reduce calorie intake. However, sardines dipped in extra virgin olive oil are also healthy, and do not contain large amounts of calories.

Sardine Salad

Ingredients
  • 8 ounce sardines with bones
  • 3 medium-sized tomatoes
  • 1 large cucumber
  • 1/4 cup of sliced onion
  • 15-ounce of chickpeas
  • 2 tablespoons of sliced Kalamata olives
  • 1/2 cup of crumbled feta cheese
  • 3 tablespoons of lemon juice
  • 1 minced clove of garlic
  • 2 teaspoons of dried oregano
  • 1/2 teaspoons of freshly ground pepper
  • 2 tablespoons of extra-virgin olive oil
Method of Preparation
  1. Cut the tomatoes, cucumber and sardines into large chunks.
  2. Mix olive oil, lemon juice, garlic, oregano and pepper in a bowl and whisk.
  3. Add all the other ingredients into it and mix well.
  4. Lastly, toss to combine well, top with some cheese and serve!
  5. This is one of the healthiest fish recipes for kids and adults.
Sardine Bruschetta

Ingredients
  • 4-5 ounces of canned sardines
  • 18 ounces of cannellini beans
  • 4-5 slices of country style bread
  • 2 oz of arugula / watercress
  • 1 and 1/2 tablespoons of fresh lemon juice
  • 1 minced clove of garlic
  • 3 tablespoons of extra-virgin olive oil
  • Salt and pepper to taste
Method of Preparation
  1. Drain the sardines and mix them with beans. Mash them together.
  2. Add oil, lemon juice, garlic, salt and pepper to the mashed fish and beans.
  3. Toast the bread and by spreading some oil over it.
  4. Place the fish mixture, arugula / watercress on top of the bread. Top with cheese if you like (optional).
Spicy Sardines

Ingredients
  • 8 - 12 sardines
  • 3 - 4 crushed garlic cloves
  • 1/4 oz of fresh finely chopped parsley
  • 1/2 cup of plain flour
  • 2 tablespoons of lemon juice
  • 4 tablespoons of vegetable oil
  • 1/2 teaspoon of ground cumin
  • Salt and black pepper to taste
Method of Preparation
  1. Mix the garlic and parsley together to form a fine paste.
  2. Spread the above mixture on the sardines from inner and outer side. Also brush some lemon juice over it.
  3. Now set the fish aside for 1-2 hours so as to let the flavors get absorbed completely.
  4. Mix cumin, salt and black pepper in the flour and form a homogeneous mixture.
  5. When the fish is ready, coat / roll it in the flour so that it is covered uniformly with it.
  6. Heat the oil in a frying pan until very hot.
  7. Slowly slide the fish in the oil one at the time fry only 2-3 fish at a time.
  8. Fry for 5 minutes or until crisp and golden brown.
  9. Serve with bread or as starters.
Sardine Spread

Ingredients
  • 8 canned sardines
  • 8 ounces of ricotta cheese
  • 1/4 cup of minced parsley
  • 2 tablespoons of capers
  • 1 teaspoon of curry powder
  • 1 teaspoon of lemon zest
Method of Preparation
  1. Drain the sardines and rinse them.
  2. Mix sardines and all the ingredients together in a food processor.
  3. Process to form a coarse mixture. The consistency should be like any other spread or dip.
  4. Serve with crackers, bread, chips, etc.
Now that you know the sardines health benefits and recipes, you should get going and try these recipes. So, plan a snack, a starter or a salad with sardines, using these recipes, for your next meal. Good luck!

Tuesday, May 1, 2012

Best Halibut Recipes Are Rich And Versatile And Include Everything


Halibut Recipe
Being one of the largest saltwater fish, the Halibut can weigh up to 160 pounds! Yes, people have been gorging on these delicious fish ever since the beginning of time. Throughout history, the Halibut has been considered by most religions as a sacred fish and has also been served at religious festivals and on holidays. A nutrient rich food, halibuts are an excellent source of proteins and other essential nutrients like magnesium, minerals selenium, potassium, vitamin B, phosphorus and above all, the extremely important omega-3 fatty acids.

In the kitchen, the halibut is just as versatile. With so many different recipes for frying, grilling, broiling, baking, deep-frying, barbecuing, poaching and pan-frying your halibut, you can take this delicious dish when you are out picnicking or even for family getaways.Some of the best halibut recipes are rich and versatile and include everything from appetizers and soups to salads and main dishes.

Grilled Halibut Recipe
Ingredients:
  • ½ a cup of low-sodium soy sauce.
  • 1 teaspoon of grated ginger.
  • Brown sugar, ¼ cup.
  • 1 garlic clove.
  • 1 teaspoon of dry mustard.
Procedure:

In a marinade dish, mix all the above ingredients and then add the halibut steaks. Cover both sides of the steaks and then set it aside for about 4 hours. Keep turning the steaks over frequently. Heat the grill at a medium temperature. Grill the steaks until they are well done but make sure they don't go dry, and keep basting them with marinade every now and then. Make sure you don't over cook the halibut, so stick to grilling it at a low temperature. Serve your grilled halibut with veggies or rice. Without being too overpowering, the marinade will give the fish a nice flavor.

Spicy Grilled Alaska Chili-Lime Halibut
Ingredients:
  • 4 steaks of Alaska Halibut.
  • Rice vinegar, ½ a cup.
  • Fresh lime juice, ½ a cup.
  • Grape seed oil, ¼ cup.
  • 1 cup of sweet Thai chili sauce.
  • Black sesame seeds, ¼ cup.
Procedure:

Mix all these ingredients together and then marinate the Alaskan steaks for about one hour. Make sure both sides are marinated well. Grill the steaks on the barbecue grill until the halibut flakes when you test it with a fork. This makes for 4 servings. The sweet Thai chili sauce is available at any Asian specialty market.

Halibut with Sambal Vinaigrette and Wasabi cream
Ingredients for Sambal Vinaigrette:
  • One and a half teaspoons of rice vinegar.
  • 2 tsp of Sambal Oelek.
  • One and a half teaspoons of Dijon mustard.
  • Vegetable oil, 1/3 cup.
Ingredients for the Wasabi cream:
  • 2 tsp of Wasabi powder.
  • 3 tbsp of water.
  • Sour cream, ¼ cup.
Ingredients for the Halibut:
  • 1 halibut steak (one and a half inch thick), skinned and bones and then cut into 4 pieces.
  • ¼ cup parsley, finely chopped.
  • ½ tsp vegetable oil.
Procedure:

Preheat the oven to about 400 degrees F. To make the Vinaigrette you need to blend all the ingredients together in a blender until a smooth paste is formed and then season this paste with salt. To make the cream you must first whisk the Wasabi powder with the water until it becomes a smooth paste and then whisk this paste in the sour cream and season with salt. To make the Halibut you must first pat the fish dry and then season it with salt and pepper. Sprinkle each side with the chopped parsley.

Heat a skillet over a high flame until it becomes hot. Then, add some oil and put in the fish with the parsley side up. Sear the fish for about 1 minute until its underside turns brown. Turn the fish over and then put the skillet in the center of the oven. Roast for about 5 minutes until the fish is well cooked. The fish is now ready to be served, parsley side up, with a spoonful of each of the sauces on top.

Halibut Hot Pie with Mashed Potato crust
Also great when served with mahi-mahi or salmon. Re-warm the potatoes in your microwave before you use them in this recipe and add more warm milk if the mashed potatoes are too thick.

Ingredients:
  • 2 tbsp of butter.
  • 1 large bulb of fennel trimmed and halved and then thinly sliced.
  • Sliced shallots, ½ a cup.
  • Flour, 2 tbsp.
  • One and a half cups of vegetable broth.
  • One and a half pounds of halibut fillets.
  • Baby spinach, 6 ounces.
  • Three and a half cups of mashed potatoes, warm.
Procedure:

Preheat the broiler. Melt the butter in a large saucepan over a medium flame. Add the shallots and the fennel. Cover the pan and cook for about 8 minutes while stirring occasionally until they turn tender. Sprinkle with salt, flour and pepper. Sauté for about 2 minutes. Add the broth and then bring it to a boil while stirring frequently. Add the spinach and fish. Cover the dish and let it simmer over a medium flame for about 4 minutes until the fish is almost done.

Transfer this mixture to a baking dish. Spoon the mashed potatoes into the dish and cover it completely. Broil the dish until it starts bubbling at the edges and the potatoes develop brown spots. Your hot pie is now ready to be served.

Thursday, April 26, 2012

Make The Best Habanero Hot Sauce Recipe As A Side Dish


Habanero Hot Sauce Recipe
For those people who prefer extra spicy foods, a deliciously prepared dish with a habanero hot sauce recipe will be the best treat. This spicy sauce goes well with any main course food recipes. In case, your family members love to have spicy foods, you can check out homemade habanero hot sauce recipe as a side dish. Or for a change from the regular food menu, you can serve them with these hot sauce recipes. Refer to the following simple habanero hot sauce recipes that you can prepare at home.

Habanero Hot Sauce Recipe for Canning
Ingredients
  • 12 habanero peppers (finely chopped)
  • ½ cup chopped carrots
  • ½ cup chopped onion
  • 2 cloves garlic (minced)
  • ½ cup vinegar
  • 1/4 cup fresh lime juice
  • 1 tablespoon vegetable oil
  • Salt and pepper to taste
Directions for Preparation
Heat vegetable oil in a skillet over medium heat. Saute the onion and garlic for about 2-3 minutes, till they turn soft. Add the chopped carrots and toss the mixture. Pour ½ cup of water and bring the mixture to boil. Cover with a lid and simmer until the carrots are cooked well. Transfer the mixture into a blender and add habanero; blend this mixture for about 3 minutes. Then, combine the puree, lime juice, vinegar and a pinch of salt and simmer for approximately 5 minutes. For storing it in the refrigerator, pour habanero hot sauce recipe in containers with tight lids.

Mango Habanero Hot Sauce Recipe
Ingredients
  • 12 habanero peppers (chopped)
  • 1 mango (peeled)
  • 1 cup yellow mustard
  • 1/4 cup white vinegar
  • 1/4 cup brown sugar
  • 1 tablespoon curry powder
  • 1 tablespoon red chili powder
  • 1 tablespoon ground cumin
  • Salt and pepper as per taste
Directions for Preparation
For preparing this fruit flavored mango habanero hot sauce recipe, first add the ingredients - habanero peppers, mango, mustard, vinegar and brown sugar into an electric blender. Grind the mixture for about 5 minutes to make a smooth paste. Transfer this paste into a frying pan and add the remaining ingredients - curry powder, red chill powder, cumin, salt and peper. Close the lid and simmer this mixture for about 5 -7 minutes. Serve this hot sauce recipe as a side dish. You can also preserve this habanero recipe in clean jars for future use.

Roasted Habanero Hot Sauce Recipe
Ingredients
  • 24 habanero peppers (roasted)
  • 8 cloves garlic (roasted)
  • 1 medium-sized sweet onion (roasted)
  • 1 cup brown sugar
  • 1 ½ cup apple cider vinegar
  • 1/4 cup molasses
  • Worcestershire sauce
  • Honey (optional)
  • Salt and pepper to taste
Directions for Preparation
For roasting habanero, garlic and onion, you can use a thick iron skillet. Over a medium heat, roast these ingredients by turning occasionally for about 20 minutes or until they become tender. Remove the roasted habanero, garlic and onion from the skillet and allow them to cool down. Remove the skin of the garlic and the cloves and add them in the blender. Using a glove, add the habanero peppers in the blender after removing the skin and seeds. To this, add ½ cup vinegar, salt and pepper and blend the mixture for 5-7 minutes.

In the meantime, heat a skillet and add 1 cup vinegar and add the mixture from the blender. Stir the ingredients - brown sugar, Worcestershire sauce, molasses and honey. Simmer the mixture over medium heat for 45-60 minutes. Serve best with chicken wings and grilled beef. More on spicy chili recipes.

You can prepare the above habanero hot sauce recipes, whenever you are expecting guests who enjoy having spicy food. Reduce the amount of habanero peppers to lessen the spiciness. You can also alter the ingredients for more flavor and taste. Make the best habanero hot sauce recipe and I amp sure your friends will ask for more next time.

Saturday, April 14, 2012

Basic Cooking Skills Can Make Delicious Grilled Pork Loin

Pork tenderloin contains less bones and more meat, in contrary to spare ribs. This is perfect cut meat for people who love to have pork recipes, but are concerned with the calorie count. Best prepared by baking and grilling methods, you can try tasty pork loin recipes for a perfect dinner. When cooked on the grill, it dries out very quickly and drains off the flavor. Nevertheless, with simple tips for grilling a pork loin, you can make rich flavored and juicy meat to suit the taste buds of your family members.

Pork Loin Grilling Instructions

Anybody who have basic cooking skills can make delicious grilled pork loin. Both pork loin roast recipes and grilled recipes are common for backyard parties during summer time. The key tips for grilling a pork loin on a gas grill are preparing the cut meat, brining for some time, oiling, using proper seasoning rub and grilling for the correct time. If you are cooking pork tenderloin, the grilling time will be lesser. The step-by-step directions for making grilled pork loin are given below.
  • Besides following proper grilling steps, cooking pork loin perfectly depends on the meat quality too. As you shop in supermarket, purchase fresh and good meat cut. Avoid pale brownish or grayish colored meat that indicates old cuts.
  • The first step for grilling a pork loin is preparation of the meat. Using a sharp butter knife, lift the thin, shiny membrane from one end and remove it completely. This meat preparation is done to allow better penetration of oil and seasoning spices.
  • After removing membrane, soak the partly prepared, lean pork loin in salt water for 8-12 hours. The brine solution can be made by dissolving 1½ tablespoons salt in half quart of water. If required, adjust the salt and water quantities for making 1 quart brine solution.
  • Brining pork tenderloin keeps the grilled meat soft, as it holds more water during exposure to direct heat. Thus, you should not skip the step for soaking meat in salt water to reduce dryness during grilling.
  • On the next day, remove meat from brine and rinse thoroughly under running tap water. Pat it dry with tissue papers and leave sometime for air drying. Now, your pork loin is ready for grilling.
  • For cooking pork loin on the same day of purchasing, rub it with olive oil from all sides after removing the outer membrane. While grilling, the coated oil conserves moisture by reducing evaporation. Thus, by oiling, you can reduce excess dryness of the grilled meat.
  • Make dry rub for ribs with your favorite ingredients. A simple recipe for dry rub seasoning is mix paprika (2 teaspoons), granulated sugar (2 teaspoons), onion salt (1½ teaspoons), garlic salt (1½ teaspoons), chili powder (½ teaspoon), ground cumin (½ teaspoon), coriander powder (½ teaspoon) and black pepper (1 teaspoon).
  • Start the gas grill and adjust it to high heat setting. To grill a pork loin on a charcoal grill, be prepared with two layers of charcoal.
  • Place the pork loin in a large platter and apply rub with your hand, making sure that you coat the meat evenly on all sides. Place pork loin over the gas grill with the fat side down and cook for 4-5 minutes. Then, flip to the other side, and continue grilling each of the remaining 3 sides for the same time.
  • For 1 pound cut meat, the pork loin grilling time is approximately 20 minutes. While grilling time is 10-12 minutes for 1 pound pork tenderloin. After the pork loin cooking time is over, check the internal meat temperature. If it measures 160° F, the pork meat is done.
This is how you can grill flavorful pork loin with easy steps. After you are done with grilling the pork loin, allow the cooked meat to settle down a bit. It continues to cook further for sometime, even after you remove from the grill. After cooling for 5 minutes or so, cut it in slices and serve with mashed potatoes, salads, spicy sauce and your favorite side dishes.

Friday, March 30, 2012

Low Fat Dinner Recipes That Are Easy To Make

In recent times, obesity has become a common issue among people of all ages. One of the most important factor for this is consumption of high fat foods. Fat is a component that lends taste to the food we eat, and it is necessary to consume fats in a moderate proportion. It is said that fats get processed in the body to provide us energy, necessary in our everyday activities. So, avoiding fat intake completely is also not advisable. It is recommended that taking up a low fat diet would provide us with essential fat intake, and also avoid the accumulation of excess fat in the body.

One should follow a low fat diet in every meal of the day, especially dinner. It is said that dinner should be a light meal and at the same time healthy. Consuming high quantity of fats during dinner may lead to storage of unwanted fats in the body as we do not indulge in any kind of physical exercises after dinner.

A healthy dinner should include a lot of vegetables, fibrous foods and fruits. Many people think that low fat dishes would taste very bland. But, now there are various ways to prepare mouth-watering dishes which have low fat content.

While cooking a low fat dinner, ingredients containing fat should either be added in less quantities or it should be substituted with something healthier. Instead of oil, low-fat sour cream can be used for cooking. It can also be substituted with jam or fruit for marinating chicken or fish. One should also avoid fried food stuffs and prefer food prepared by boiling, baking or steaming. Butter can be replaced by omega-3, low fat margarine or spices, to make a dish that is low in fat.

Let us look at some low fat dinner recipes that are easy to make and yummy to taste.

Low-Fat Spicy Chicken

Ingredients
  • 4 ounces boneless, skinless chicken breasts
  • 2 medium-sized onions
  • 2 garlic cloves
  • 2 green or red chilies
  • 3 teaspoons brown sugar
  • 2 tablespoons soy sauce
  • 2 teaspoons olive oil
  • 2 teaspoons fresh ginger
  • 12 ounces fresh basil leaves
  • Basil sprigs
Preparation

Cut the chicken breasts and onions into ¼ inch thick slices. Peel the ginger and cut them into small pieces and chop the green or red chilies into long and thin slices. Take a bowl and mix brown sugar and soy sauce. Add chicken slices to it and let it marinate for 5-7 minutes. Heat the oil in a non stick frying pan and when it turns hot, put in the marinated chicken. Cook for 4-5 minutes in low heat (stir frequently) and when the chicken turns slightly brown, take it out and keep aside. In the same pan, fry onions in the remaining marinade for 3-4 minutes, and add garlic, ginger and chilies. Stir for a minute and put the cooked chicken into it. Cover the pan and let it cook well. Top it with basil leaves and basil sprigs.

Low fat Rice-Kidney Bean Dish

Ingredients
  • 400 grams kidney beans
  • 200 grams uncooked rice
  • 1 green pepper
  • 4 tablespoons tomato puree
  • 2 cloves garlic
  • salt- as per taste
  • 1 large onion
  • 1 tablespoon olive oil
  • 1 teaspoon cumin powder
  • 1-2 green or red chilies
Preparation

Wash the kidney beans, and drain the liquid in a container and keep it aside. Chop onion, garlic, pepper and chilies into small pieces. In a large cooking pan, heat olive oil and add these ingredients into it. Put in cumin powder and salt, and fry for 2 minutes. Pour in the tomato puree and cook for 2-3 minutes in low heat. Add rice and beans into it and mix all the ingredients. Add the liquid of the kidney beans, along with water, as required for the rice to cook fully. Cover the sauce pan and let it cook for 50-55 minutes on low heat. Before taking it from the heat, check whether all the water is drained. Transfer it into a bowl and serve hot.

Controlling the intake of fat is necessary, because consuming foods that are high in fats can lead to ailments of the heart and arteries. A dinner comprising dishes made of low fat, is a method of maintaining a healthy body in a delicious way.

Friday, March 23, 2012

Try Out Healthy Ground Beef Recipes For Dinner

Whether you called it ground beef or minced meat, it can be made into a tasty treat for dinner. Apart from its versatility, this affordable meat is a healthy choice for non-vegetarians. The lean ground beef contains a high percentage of proteins, vitamin B, zinc and iron. Many of us already know how to cook ground beef. If you are not, then also you can try out heart healthy ground beef recipes for dinner, with less effort.

Quick and Healthy Ground Beef Recipes

So, you crave for minced beef dishes and ground beef casserole recipes, but are concerned about the high calorie content? Not to worry, as there are some best healthy ground beef recipes, which you can try making at home. In order to ensure that you are consuming less fatty ground beef, purchase a reputable brand, approved by the FDA (Food and Drug Administration). Also, do not forget to add sufficient amount of veggies in your cooking. The following are some easy healthy ground beef recipes for you:

Healthy Ground Beef with Vegetables Recipe

Ingredients
  • 2 pounds ground beef
  • 1 ½ cups thinly sliced onion
  • 1 garlic clove, minced
  • 1 cup finely chopped carrot
  • 1 ½ cups slices yellow bell pepper
  • 1 ½ cups slices red bell pepper
  • 1 (14.5-ounce) can no-salt-added stewed tomatoes
  • 1 (8-ounce) can no-salt-added tomato sauce
  • 2 bay leaves
  • 2 tablespoons balsamic vinegar
  • 1 tablespoon olive oil
  • ½ cup dry white wine (Optional)
  • 1 ½ teaspoons salt
  • 1/8 teaspoon black pepper
Directions for Preparation

If you are looking for healthy low calorie ground beef recipes, this one is for you. This minced meat and veggie dish yields about 300 calories per serving. To start with cooking, preheat a nonstick pan over medium high heat. Add beef and cook till brown. Drain oil and transfer meat into a platter. Return pan to heat and add olive oil. Saute onion and garlic for 1-2 minutes. Stir in carrot, yellow bell pepper and red bell pepper. Cook for 3 minutes and then add cooked beef. Then, add all the remaining ingredients - tomato sauce, vinegar, white wine, salt and pepper. As it reaches boiling temperature, reduce heat and cook for 15 minutes. Discard bay leaves and serve hot.

Healthy Ground Beef and Macaroni Recipe

Ingredients
  • 1 pound extra-lean (93%) ground beef
  • 2 cups macaroni noodles, cooked
  • 1 large onion, chopped
  • 1 (28 ounces) cans crushed tomatoes
  • 1 cup finely grated low fat cheese
  • 2 tablespoons chopped fresh basil
  • 1 teaspoon kosher salt
  • Freshly ground black pepper to taste
Directions for Preparation

This is one of the healthy ground beef recipes that you can try out at home. Preheat a thick skillet, and brown onion and beef. Stir in tomato sauce and cook for another 10-15 minutes over medium low heat setting. Season with salt to taste. Stir well and taste, if the seasonings are perfect for your taste. Remove from heat, cover lid and keep aside. Cook macaroni in a pot, as per the directions mentioned in the package. Check for doneness and drain water. Transfer cooked macaroni into serving bowls. Then, top it with meat mixture, grated cheese and pepper. While serving, garnish the dish with basil.

Wednesday, March 14, 2012

A Number Of Different Ways To Cook Salmon

There are many ways of cooking salmon, which include baking, frying, grilling etc. One often gets bored by eating the same kind of recipes, but almost all the salmon recipes call for different style of cooking, that is when we again switch back to the normal boring recipe! And that is why I have mentioned here almost all styles of cooking salmon. Many times, we are not lucky enough to find fresh salmon, and the only option which is left is frozen salmon. If you cook frozen salmon the same way as the normal one, there is a possibility of it tasting different, a bit less tasty. The correct way of cooking frozen salmon has been given below. With the help of this recipe, you will be able to answer the question?

Ingredients
  • 12 ounce salmon fillet, cut into 4 pieces
  • Freshly ground black pepper
  • Coarse-grained salt
Process

Preheat the oven to 450º F and start seasoning with pepper and salt. Now place the salmon on a non-stick pan, side down. Bake the salmon in the preheated oven for about 12 - 15 minutes, or until it is cooked thoroughly. So now you can give rest to the question, how to cook baked salmon.

 Ingredients
  • 2 frozen pie crust circles or make your own
  • 1½ tbs butter
  • 2 cups hot or newly cooled cooked rice (do not use instant rice)
  • 1 pint canned red or king salmon
  • 1 medium onion diced
  • 1 beaten egg
  • Salt and pepper as desired or needed
  • 1 tsp granulated onion (optional)
Process

Take onions and butter and place them in a microwave. Cook until the onions are clear. Till that time, mix all the ingredients and place in a pie crust lined pie pan, pressing down a bit lightly. For covering, use the top crust and seal. Cut the openings and lightly brush canned milk on the crust and then bake at 350º F, until it turns golden brown. Serve hot.


Ingredients
  • 2 tbsp capers
  • 4 (6 ounce) fillets salmon
  • 1/8 tsp ground black pepper
  • 2 tbsp olive oil
  • 4 slices lemon
  • 1/8 tsp salt
Process

Firstly, preheat a big heavy skillet for about 3 minutes, over medium heat. Then cover salmon with olive oil and place in the skillet, increasing the heat to high. Cook for 3 more minutes and then sprinkle pepper, salt and capers. Now turn it over and cook for about 5 minutes. You will understand that the salmon is done, when it flakes with fork. Garnish with lemon slices while serving.

Ingredients
  • toasted sesame oil
  • ginger soy salad dressing
  • Wasasbi rice seasoning
  • frozen salmon fillets
Process

Preheat the oven at 350º F. Take aluminum sheets, which are big enough to fit the salmon and brush them with toasted sesame oil. Place a piece of frozen salmon on each sheet and brush the sides and top of the fish with ginger soy salad dressing. Then sprinkle wasabi rice seasoning on each piece. Once you are done with this, join the ends of the aluminum foil and fold, only till it reaches the salmon. Fold, to seal each piece into individual packet. Place these packets onto a cookie sheet and bake in the preheated oven for about 45 minutes. Serve with slice of lemon.

Ingredients
  • 1 lemon, wedged for garnish
  • 2 pounds salmon fillets or 4 salmon steaks, ¼ lb. to ⅓ lb. each
  • 1½ tbs olive oil, extra virgin
  • Salt and freshly ground pepper to taste
Process

First brush the charcoal or gas grill grates with oil, so that the salmon does not stick. Then place rack about 4 inches from the heat source and heat the grill at a high temperature. Now brush a thin coat of oil on the pieces of fish and grill for about 5 minutes, flesh side down. After 5 minutes, turn over the fish and grill for 2 - 3 minutes more. Serve immediately.

These were some of the tasty answers to your question, how to cook salmon? Try each of the recipes and decide which is your favorite. You can also try the same recipes with other fish.

Thursday, March 1, 2012

How To Make Healthy Fruit Salad

One of the best delicious desserts is really the bowl ful of fruits or most popularly known as fruit salad. Seems just as a platter filled with fruits, fruit salad dish is essentially made with salad recipe dressings. The fruit salad dish is broadly valued all over the world for its sweet fruity taste plus different health benefits, that the range of fruits gives.

The bowl of fruit is not simply a dessert, but may also be consumed just as one entre. To put in a few additional graces for the recipe, you could try covering the fruits in thick sweet syrup or some basic thick fruit juice. Usually, you don't get an opportunity to enjoy fruit salad in hotels or restaurants, so it is always better that you try making your own fruit salad recipe at residence.
Well, the procedure of making fruit salad recipe is most likely the best. All you have to do is make preparations with a few of your preferred fruits and a couple of other elements. If you could have fruit trees planted in the backyard, it is going to be truly easy that you can make the salad. You may also look at the closest grocery store for fruits which may be difficult to find in the patch.

Most fruit salads contain these fruits like components: grapes, apples, peaches, pineapples, and also the likes. You can even pick up a few fresh and nice strawberries and blueberries. In order to provide some flavors, you may as well make use of new honey, sour cream and some mint leaves on the top end of the fruit salad. As a rule, two cups filled up with various clean fruits are adequate to make a fruit salad which will serve up 3-4 people. Subsequently, merely mix them right along with the fruit salad dressing and revel in your bowl filled with nourishing and delicious fruits snack.

Preparing the salad is generally similar to the easiest way you make the delicious platter of fruit - a common disparity is that you have to create a dressing for the salad. There are actually various dressings on hand that ought to be elected in respect to the fruits you intend to include within the salad recipe. Within Europe, for example, mayonnaise is needed as the primary elements for the salad, while condensed milk is needed as the leading dressing ingredients for fruit salads in Asia. Those salads, no matter what type of dressing, contain single common flavor: they are definitely meant to get sweet.

Monday, February 27, 2012

Delicious Cheese Cake with Ice Cream

 1/2 cup of powdered sugar (adjust your sugar to the sweetness of your cherries. Not rocket science.)
6 oz of cream cheese
1/3 cup sour cream
1 1/4 cups of heavy cream
1/4 cup milk
1/3 cup lime juice (lemon is okay too- I just happened to have limes here.)
The zest of 2 limes. (lemons are okay too... see above.)
1/4 tsp. vanilla extract

About 6 graham crackers (I like honey grahams. You use what you like.) 3 tbs of melted butter. Put these two things in a processor. If you have graham cracker crumbs already just use about 1/2-3/4 cup of those. I just can't seem to find ready made crumbs near me for blood or money.

The point is, mix the crumbs and the melted butter so the crumbs kind of cling together. This is important, because if you don't add the butter, the crumbs kinda just become "dirt." The butter holds them together and will create a swirl if you do it right, and all the planets align. Divide the cut cherries in half. Use half in the ice cream base. Put 1/2 of the cherries, and all the other ingredients in a blender. Turn the blender on. Create ice cream base. Put base into ice cream machine. Make food, according to manufacturer's instructions. Right near the end of the process, add the other half of the cherries.

At the very end, when you only have a couple of turns of the blades left, pour the crumbs in a steady stream into the ice cream maker. Do not overmix the crumbs. You want a ribbon, not the crumbs to mix all over the place. Gently transfer the ice cream to whatever you intend to freeze it solid in. Again, don't stir it too much or you'll blow the texture.

Thursday, February 16, 2012

How To Cook Pizza

I tried this recipe last night and the result was fabulous. Now to make pizza you don’t need oven. You can simply make it in pan on your regular stove and result is same as like the baked pizza.

For Dough
  • 2 1/2 cup flour
  • 2 tsp yeast
  • 2 pinch sugar
  • 1/2 tsp salt
  • 1-2 tbsp olive or cooking oil
For Pizza Paste
  • 1-2 tbsp oil
  • 1 clove garlic, chopped
  • 1 onion, sliced
  • 500 gm tomatoes, chopped
  • 2 pinch oregano
  • 2 pinch sugar
  • Salt to taste
For Pizza Topping
  • 150 gm boneless chicken
  • Salt to taste
  • 2 tbsp chili sauce
  • 2 spring onions with leaves, chopped
  • 2 tomatoes without seeds, chopped
  • 1 capsicum, chopped
  • 8-10 olives
  • 5 mushrooms, chopped
  • 1/2 tsp red chili flakes
  • 1 cup mozzarella cheese, grated
  • 1/2 cup cheddar cheese, grated
Method Of Pizza
  • For dough, just mix all the ingredients and knead them with water. Put it in room temperature covered for 3-4 hours till it becomes double in its size.
  • For sauce, sauté onion and garlic in oil, add spices and tomatoes. Cook it for 2-3 minutes and then blend it in blender. You can also store this sauce in refrigerator. I also added the red chili flakes in sauce.
  • Fry the chicken in oil than add little water and cook till the chicken is done. Add chili sauce and salt in it. Remove from heat and add all vegetables in it. Add red chili flakes and 1/2 tsp oregano in it and mix it well.
  • Now make a round pizza base from dough with the help of rolling pin. Preheat the pan on stove. Put the pizza base in pan and cover it, cook it on low flame for 2-3 minutes.
  • Now take out the base from pan and apply the pizza sauce on other side, which is already cooked.
  • Put chicken and vegetable mixture on it and then sprinkle both cheese on it.
  • Put it in pan again and cook it covered for 15 minutes or till the pizza leaves the pan.
Tip: You can change the toppings according to your choice and you can also make this pizza in oven.

Wednesday, January 25, 2012

How To Cook Grilled Chicken Sliders

Sliders are easy to make and even better to eat, but sometimes sourcing buns for them can be a problem.  If Alexis doesn't have time to bake a batch from scratch, I usually just use Kings Hawaiian Sweet Rolls.  But yesterday, she found a 16 pack of slider buns from Pepperidge Farm at Wallyworld.  It might not be a new product but it's new to us so I thought I'd share.
Anyway, here are some grilled chicken sliders that I made last night.  The first time I made them, I didn't add the beer to the glaze and it burned almost instantly because of the sugars.  The second time, the additional liquid made it work perfectly.  If you don't want to use beer, you could just use chicken stock but I like the nutty flavor a dark beer adds to the sweet glaze.
Grilled Chicken Sliders
Ingredients
2 chicken breasts, boneless, skinless
2 tsp poultry rub (see notes)
8 slider buns
toppings of your choice such as lettuce, tomato, onion, or pickles
For the glaze
2 Tbsp Maple agave nectar (see notes)
2 Tbsp amber style beer
1 Tbsp lime juice
1 Tbsp white wine vinegar
For the spicy mayo
1/3 cup mayonnaise
2 Tbsp Cholula chipotle hot sauce
1/2 tsp smoked paprika
Instructions
Preheat your charcoal grill set up for direct heat to 350f (medium). 
Mix the spicy mayo together and refrigerate.  In another bowl, mix the glaze together and set aside.
Using a very sharp knife, slice each breast in half lengthwise to make cutlets.  Cut each cutlet in half.
Season your cutlets on both sides with poultry rub.
Grill cutlets 2-3 minutes, just until the edges start to turn white.  Flip and grill another 2 minutes.
Brush with the glaze on both sides and cook another minute.  Check with a thermometer to make sure they are properly cooked to an internal temperature of 165f.
Toast slider rolls on the grill, if you prefer.
Serve on rolls with the spicy mayo.
Notes
For poultry rub, I used Albukirky Seasonings new Green Chile Rub.  You can make a quick poultry rub of 1 tsp Kosher salt, 1/2 tsp black pepper, and 1/2 tsp of garlic powder.
If you don't have maple agave nectar, you could substitute honey or maple syrup.

Thursday, January 5, 2012

How To Make Fire Roasted Hassleback Sweet Potatoes

A part of dinner last night was those cute Hassleback potatoes and after dinner, Alexis wondered aloud if we could do that with sweet potatoes.  Why not?  So I tried it for lunch.  You could also cook this in the oven at the same time and temps, but fire roasting adds that extra touch.
Fire Roasted Hassleback Sweet Potatoes
2 ea sweet potatoes, washed and dried
2 Tbsp butter
3/4 tsp salt
3 Tbsp butter
2 Tbsp Agave nectar (or honey)
1/4 tsp cinnamon, fresh grated
1/8 tsp cayenne pepper
Light your charcoal.  Set up your charcoal grill for an indirect set up (cooking over a void with coals to the sides) at 425f. 
Slice the potatoes almost all the way through in 1/8" intervals.   I picked up a trick that makes that easier somewhere on the Internet and can't remember where.  So I can't give appropriate credit but I didn't come up with this genius idea. 
Remove and let cool for 5 minutes.  You might need a wide spatula to remove them without breaking.
Meanwhile melt the 3 Tbsp of butter and add the agave nectar (or honey), cinnamon, and red pepper.  Drizzle the butter mixture over the potatoes and serve.
I'm not a huge fan of sweet potatoes, I usually make them because my life loves them (this was a practice run for Valentines and our anniversary coming up).    But I really liked these.  The fire roasting enriched the flavor and the velvety butter sauce has sweet with a subtle heat to it. 
Deep Fried Hassleback Potatoes
While that was cooking, curiosity struck again.  I wondered if you could deep fry small russets done hassleback style so I tried it with two of them.  I deep fried them for 3 minutes at 375f.   As soon as they came out of the fryer, I hit them with kosher salt.
They were good but I prefer them baked.  The petals or slices open up better during baking whereas the frying happened so quick that I had to "reslice" some of the pieces to open them manually before salting.